ShopDreamUp AI ArtDreamUp
Deviation Actions


Description
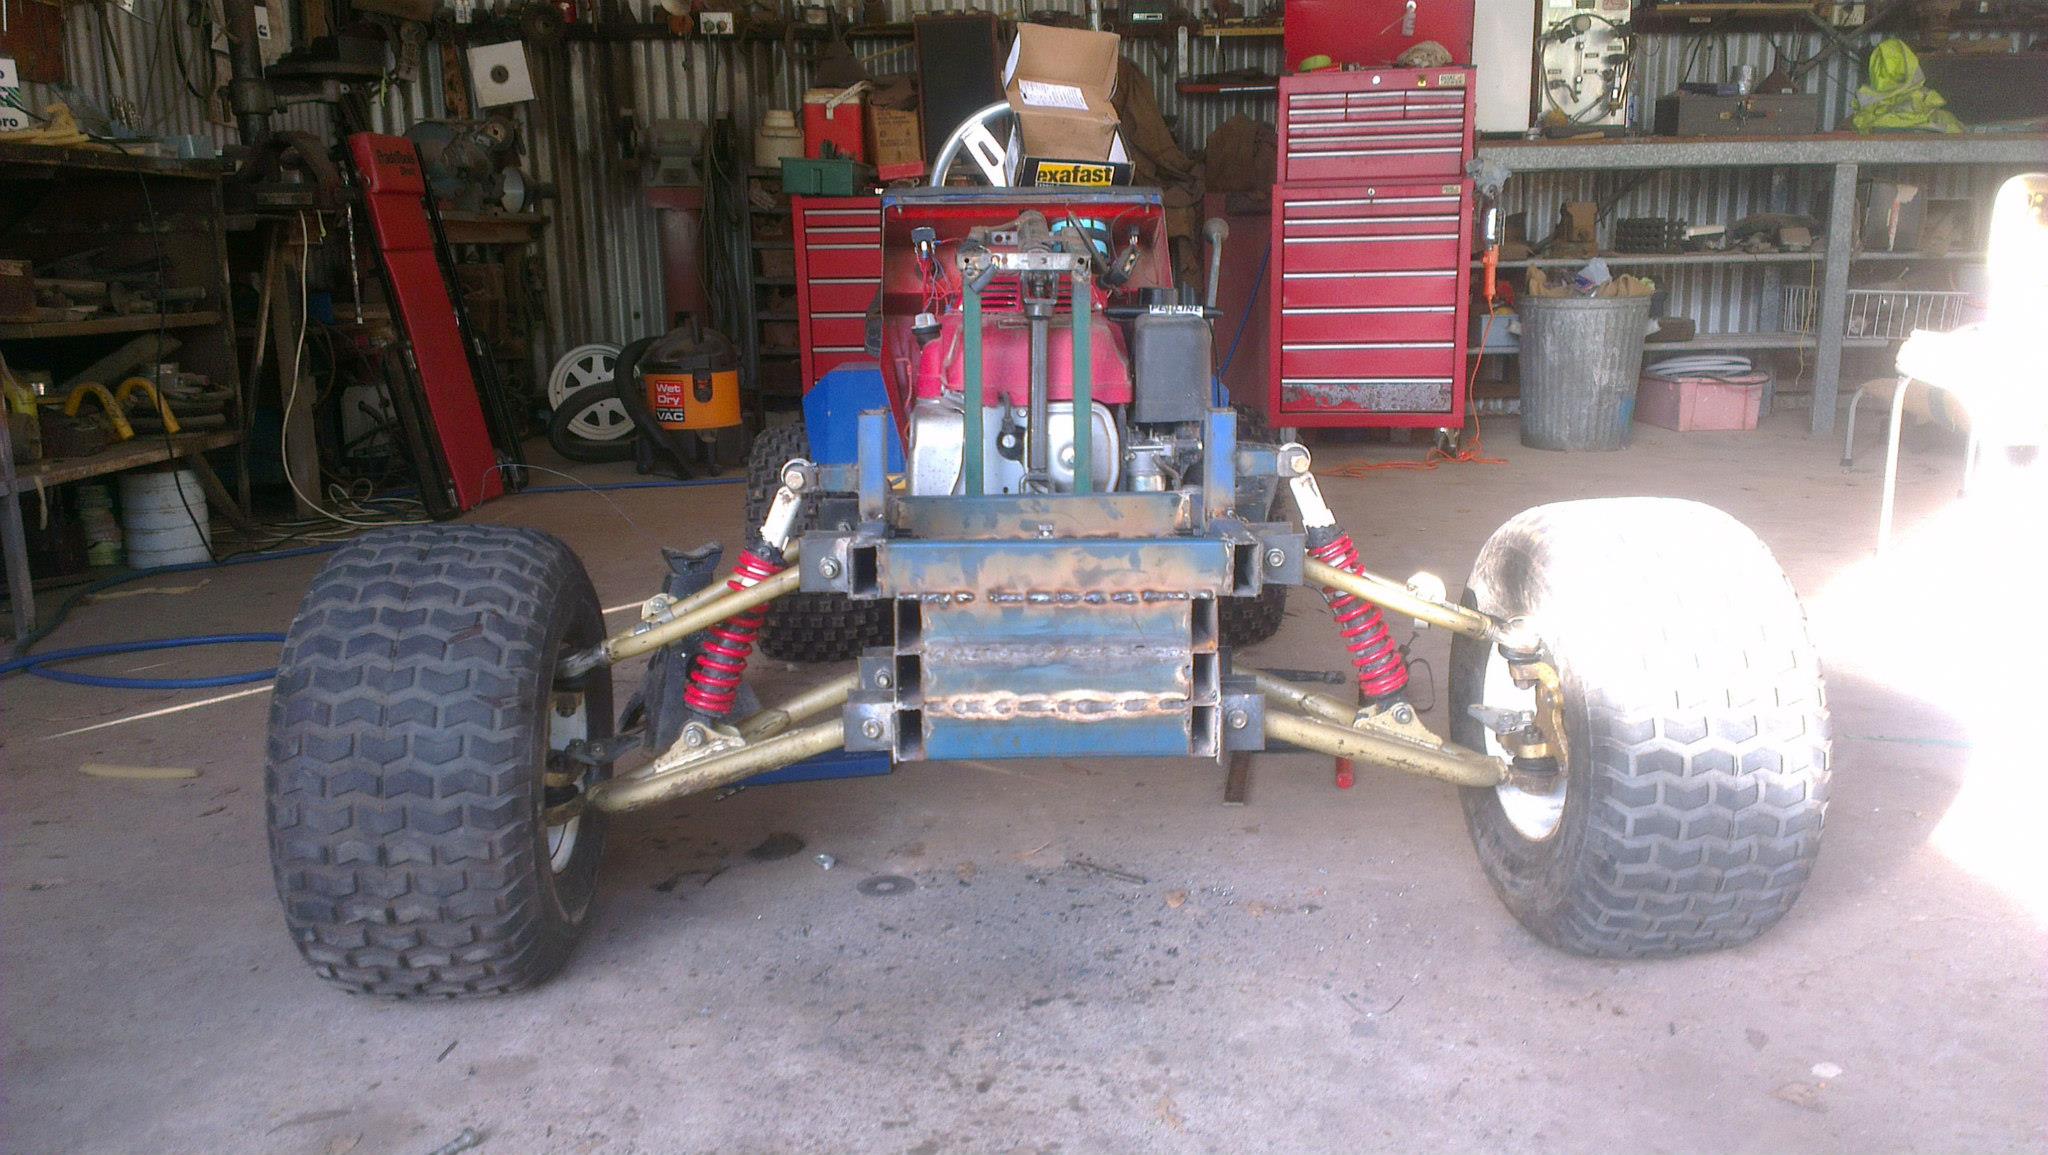
here is a photo of the new control arms freshly installed on the mower
THE LIST MODIFICATIONS FROM START TO FINISH ARE AS FOLLOWS. (JUST A GENERAL OVERVIEW OF THE PROCESS)
1. pulled everything off or down to its most basic state. then kept the parts that i wanted to use like bolts, nuts, mounts and the like.
2. in the end only kept the covers and the folded plate deck a few pulleys and all nuts and bolts.
3. got some RHS and reinforced all the under the deck (coz it is only 3mm thick plate and folded into shape)
4. then i set about designing the and building the control arms L and R and spindles L and R (from scratch) (the first arms and spindles were from made from scratch and then later i bought some quad arms, spindles and hubs).
5. made template for control arms and spindles and then assembled and welded the structures together.
6. sourced front and rear wheels and a lawn mower transmission in this build a (Dana Foote Spicer 6 Speed Transaxle 4360), a new engine (honda GXV 390 17 HP), steering wheel, CV steering stem, a rack & pinion steering rack, pulleys , belts, centrifugal clutch, front and rear hubs. 11" shocks for the the front independent suspension and the mounting hardware for them, lots more RHS, steel tubing 1" & 3/4", 5/8" rod, throttle cable, springs for the throttle, a 2000 pound ATV winch, honda TRX 250R front control arms, spindles, hubs, front hydraulic disk brakes, a taco and some other things but i think that i've covered the large portion of the bits and pieces that i had to source for this project.
7. assemble, modify and adapt all the parts that i had made or purchased to their respective places on the deck and frame work that had been made by the RHS.
8. mount the suspension in the control arms then the transaxle under the deck and mount the engine to the deck and the steering rack in the proper position so as to line up perfectly with the spindles.
9. put the pulleys and clutch on the engine and transaxle then measure for a belt size and purchase.
10. build framework for the steering column and link the CV steering stem to the mounted steering rack.
11. build and fine tune the gear shifting linkage for the transaxle.
12. make the necessary addons the the framework to then mount all the covers and seat to the chassis of the now almost complete mower.
13. make the battery bay for the battery.
14. do the mission of creating the wiring harness for the lights, starter motor, taco and kill switch (so if the you fall off the engine will stop straight away).
14. just gotta do a few more little things here and there but the mower is basically finished.
HERE ARE THE STATS ON THE MOWER NOW THAT IT HAS BEEN FINISHED FOR NEARLY A MONTH.
ok i've managed to get to a consistent speed of 58 KPH. drifting is fun and off road is not a problem at all it just keeps on going.
Image size
2048x1155px 319.39 KB
© 2013 - 2024 bbart49
Comments0
Join the community to add your comment. Already a deviant? Log In